Self-hosting: Publishing an app to the internet using CloudFlare Tunnels


It's 2026 and there are plenty of guides out there trying to show people how to self-host applications, but not too many actually mention when to use a particular technology.
So here is a Part 2 of 4 of self-hosting, a guide on securely & publicly publishing a self-hosted Docker containerised app.
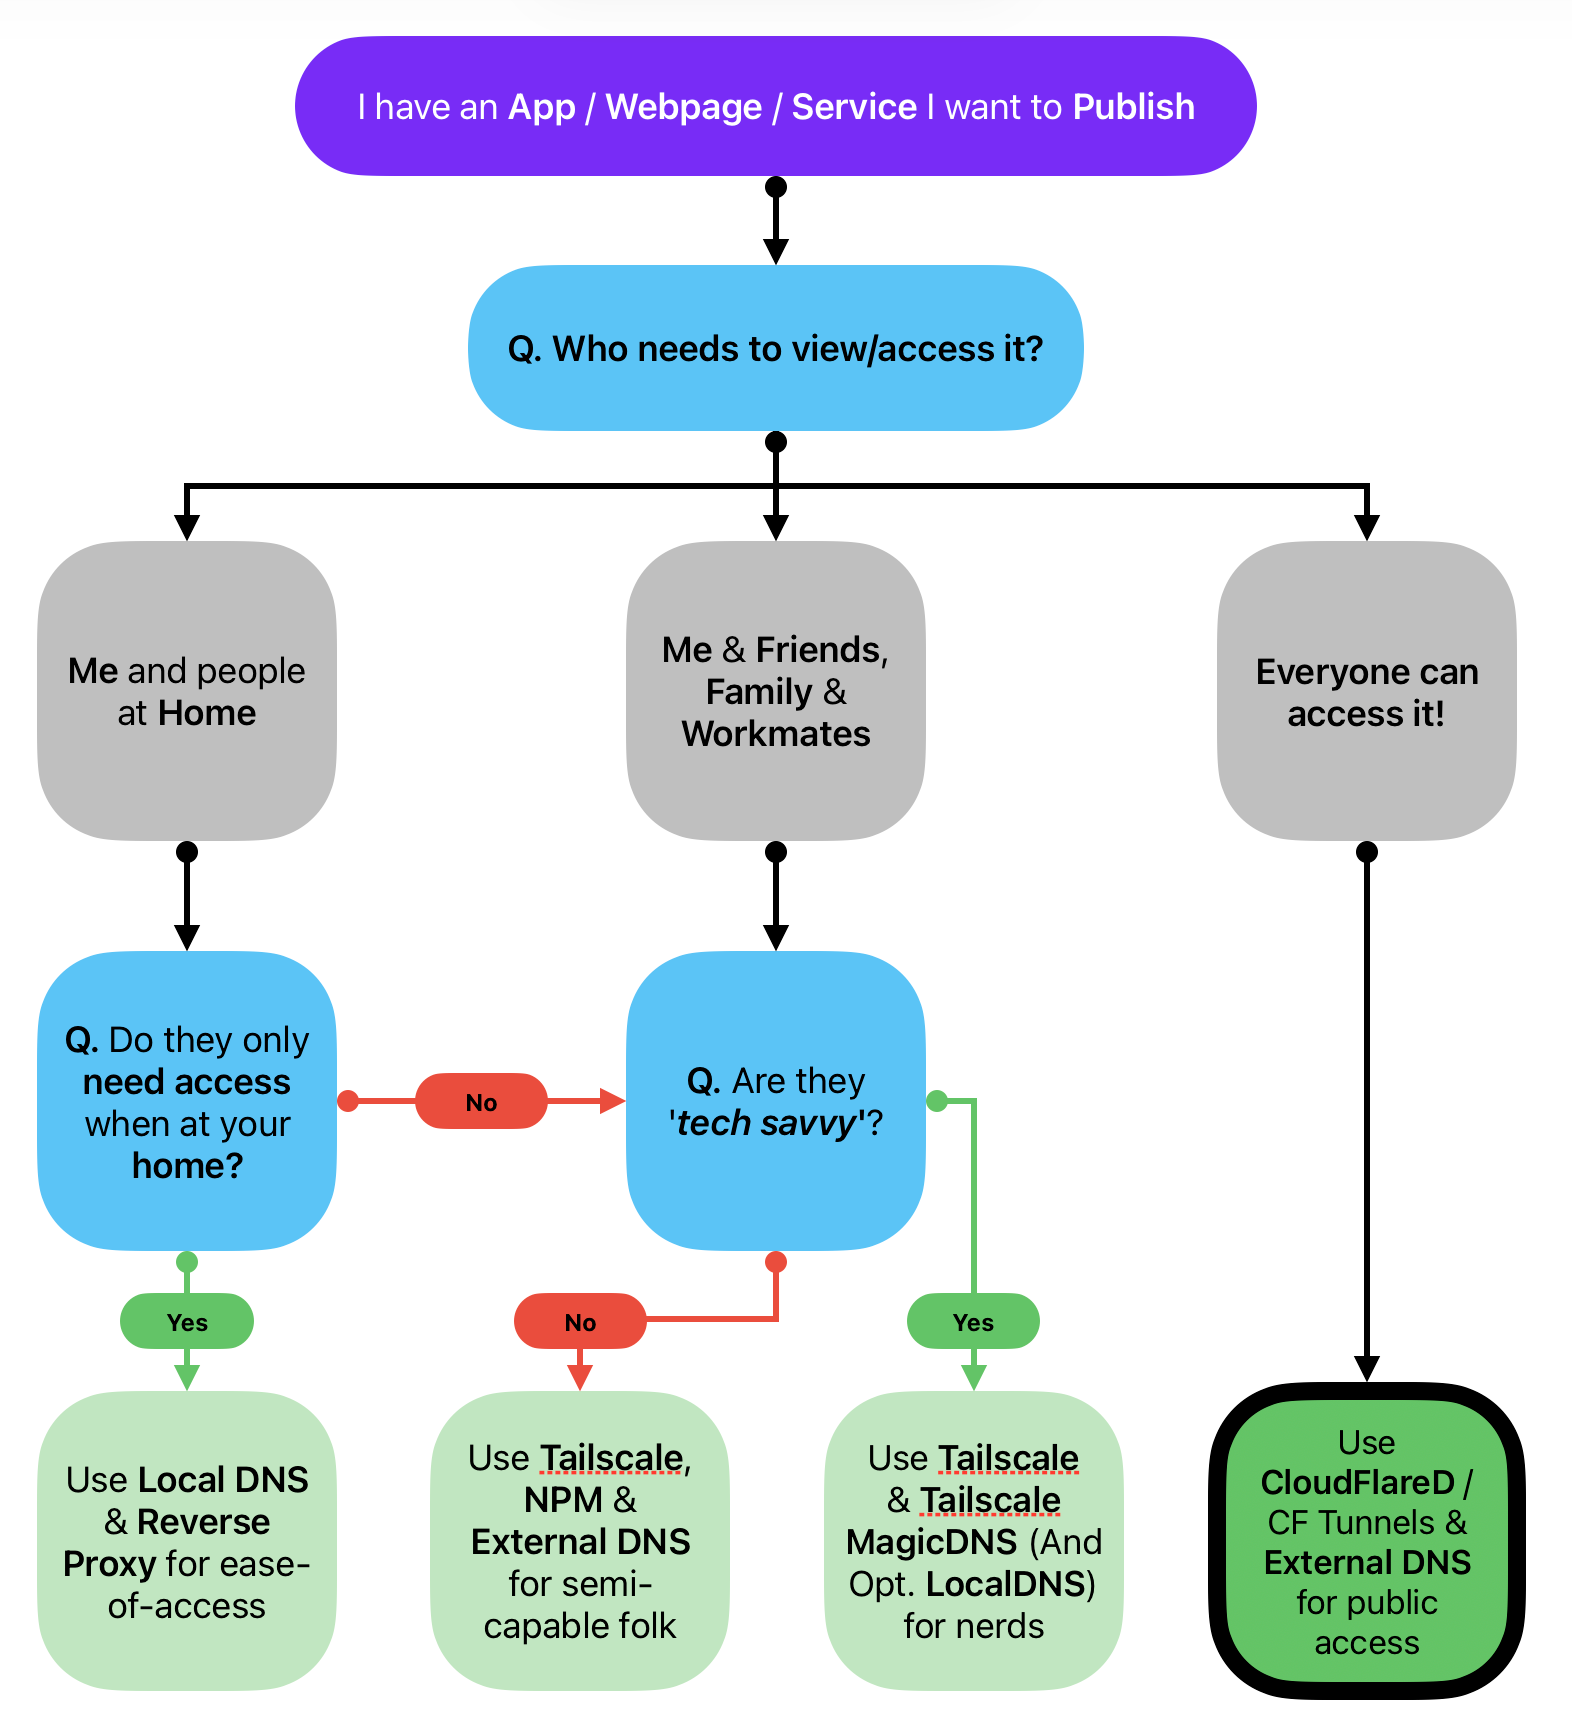
Scenario: I want to host and share a webpage / app from my home to the world
Below are some questions I asked myself before venturing on this journey:
- What app/service am I hosting? A free powerful PDF management tool that runs client side
- Why am I hosting it? Cause I want to own my data, experiment with technology and the internet and ultimately teach others who would like to embark on this journey!
- Who is/are the user(s)? Me - the publisher. You - the users
- Where will the user(s) access it? From the internet, any device, anywhere, anytime.
- Is it worth hosting this myself? Yes, I would to manage my .PDF files from anywhere regardless of my device. I don't want to download a 'freemium' PDF app on my mobile device just to do some pdf file changes.
Publishing an App (BentoPDF) publicly and securely via CloudFlare Tunnel and Docker on Linux (Ubuntu)
Before I start, while you can use any system to be your Docker host (e.g., MacOS/Windows/Linux), I would recommend using a Linux based operating-system, and then installing your Docker app that you'd like to publish to the public, to be placed onto a system that will stay online for as long as you want it to stay online.
For example, this blog is up 364 days of the year, with the occasional downtime due to maintenance or blackouts. That's why I installed it onto a Raspberry Pi with 'Ubuntu Server' & Docker installed and not onto my Windows or Mac systems that get rebooted / fiddled with constantly. You've been warned!
Difficulty, Tech Stack & Requirements
- Difficulty: Novice enthusiast. You will need to understand your way around a terminal. Know basics of
sshand terminal text-based editors. - Time Required: 30 minutes
- Tech Stack / Requirements:
- A computer with a internet connection (Linux / MacOS / Windows)
- Optional but recommended: A computer that can run Ubuntu Server OS - it will be our Docker host
- An External DNS domain name (Just use CloudFlare DNS, approx. $20AUD a year)
- A CloudFlare Account to use CloudFlare Tunnels (free-tier)
- Apps Installed:
- Docker, a container virtualisation software
- BentoPDF, a self-hosted free PDF manager containerised app
- CloudFlare Tunnels via Docker Container deployment method
Disclaimer
Before we dive deep, yes, there's better ways to achieve the same outcome, but they all have different difficulty scales and this below balances simplicity and security.
Technical Instructions
Part 1. Installing Docker on Ubuntu Server
- Start by jumping into your Ubuntu server from your Mac/Linux/Windows system with
ssh $yourusername@$ubuntu-ip-addresswith of course replacing your username and IP address accordingly
If you don't know how to install Ubuntu Server, then the following steps also works on MacOS viaTerminal.appor Windows withWSLinstalled. Although you may need to install Docker Desktop which I'm not a fan of.
- Install
Dockerand other supplementary add-ons (E.g. docker-compose), run the following command to add the Docker repository to the Ubuntu repositories so we can install it in Step #3.
# Docker UBUNTU Repo
# Add Docker's official GPG key:
sudo apt-get update
sudo apt-get install ca-certificates curl
sudo install -m 0755 -d /etc/apt/keyrings
sudo curl -fsSL https://download.docker.com/linux/ubuntu/gpg -o /etc/apt/keyrings/docker.asc
sudo chmod a+r /etc/apt/keyrings/docker.asc

# Add the repository to Apt sources:
echo \
  "deb [arch=$(dpkg --print-architecture) signed-by=/etc/apt/keyrings/docker.asc] https://download.docker.com/linux/ubuntu \
  $(. /etc/os-release && echo "${UBUNTU_CODENAME:-$VERSION_CODENAME}") stable" | \
  sudo tee /etc/apt/sources.list.d/docker.list > /dev/null
sudo apt-get update
Running another OS? Go to Docker's Installation site to find out how to install there: https://docs.docker.com/engine/install/
- Install Docker using
sudo apt-get install docker-ce docker-ce-cli containerd.io docker-buildx-plugin docker-compose-plugin
We are now ready to start deploying apps!
Part 2. Deploying BentoPDF via Docker Compose
- Lets create a new folder and change directory to it, from Ubuntu Server run
mkdir ~/bentopdf && cd ~/bentopdf - Create a Docker Compose file to instruct it what to do
vi compose.yamlornano compose.yaml - Paste the following YAML into
vimornano
services:
  bentopdf:
    image: ghcr.io/alam00000/bentopdf-simple:latest
    ports:
      - "3000:8080"
    restart: unless-stopped
compose.yaml, we're deploying the simple version 😄
- If you're using VIM, hit
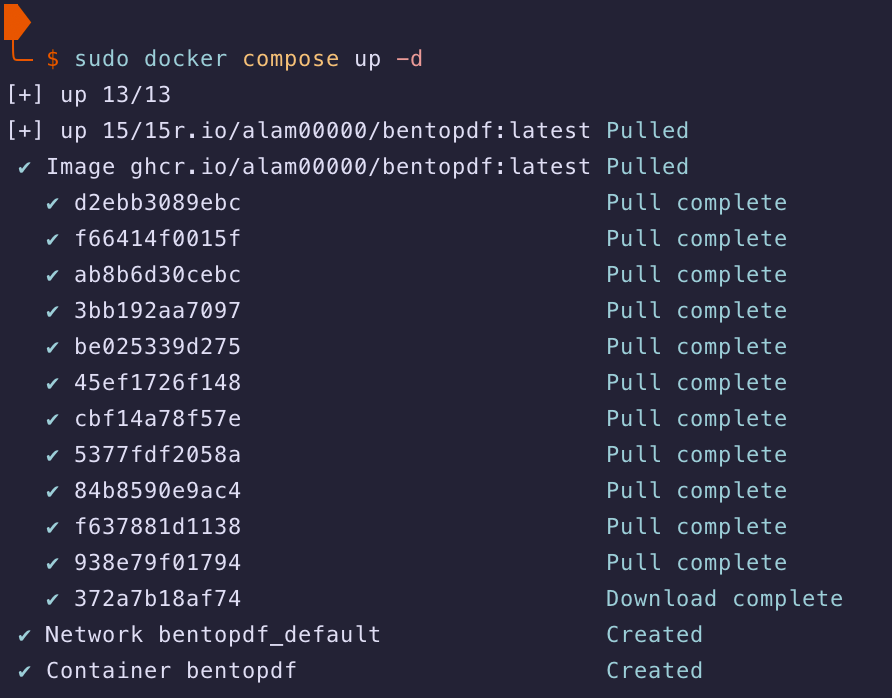
escthen type:wq!and hit enter to save the file - Run the container using
sudo docker compose up -d
This command runsdocker composeas root viasudoand the parametersupis to create the container and-dis to run it 'detached' in the background.
- Now, you should be able to open it from your Local network via the URL
http:\\IPADDRESS:3000
Make sure to update the IP Address to the Server's IP Address, if you're not sure what it is, then type ip -a when in the Ubuntu SSH session and checking it, my Ubuntu/Debian server's local IP address is 10.0.1.47)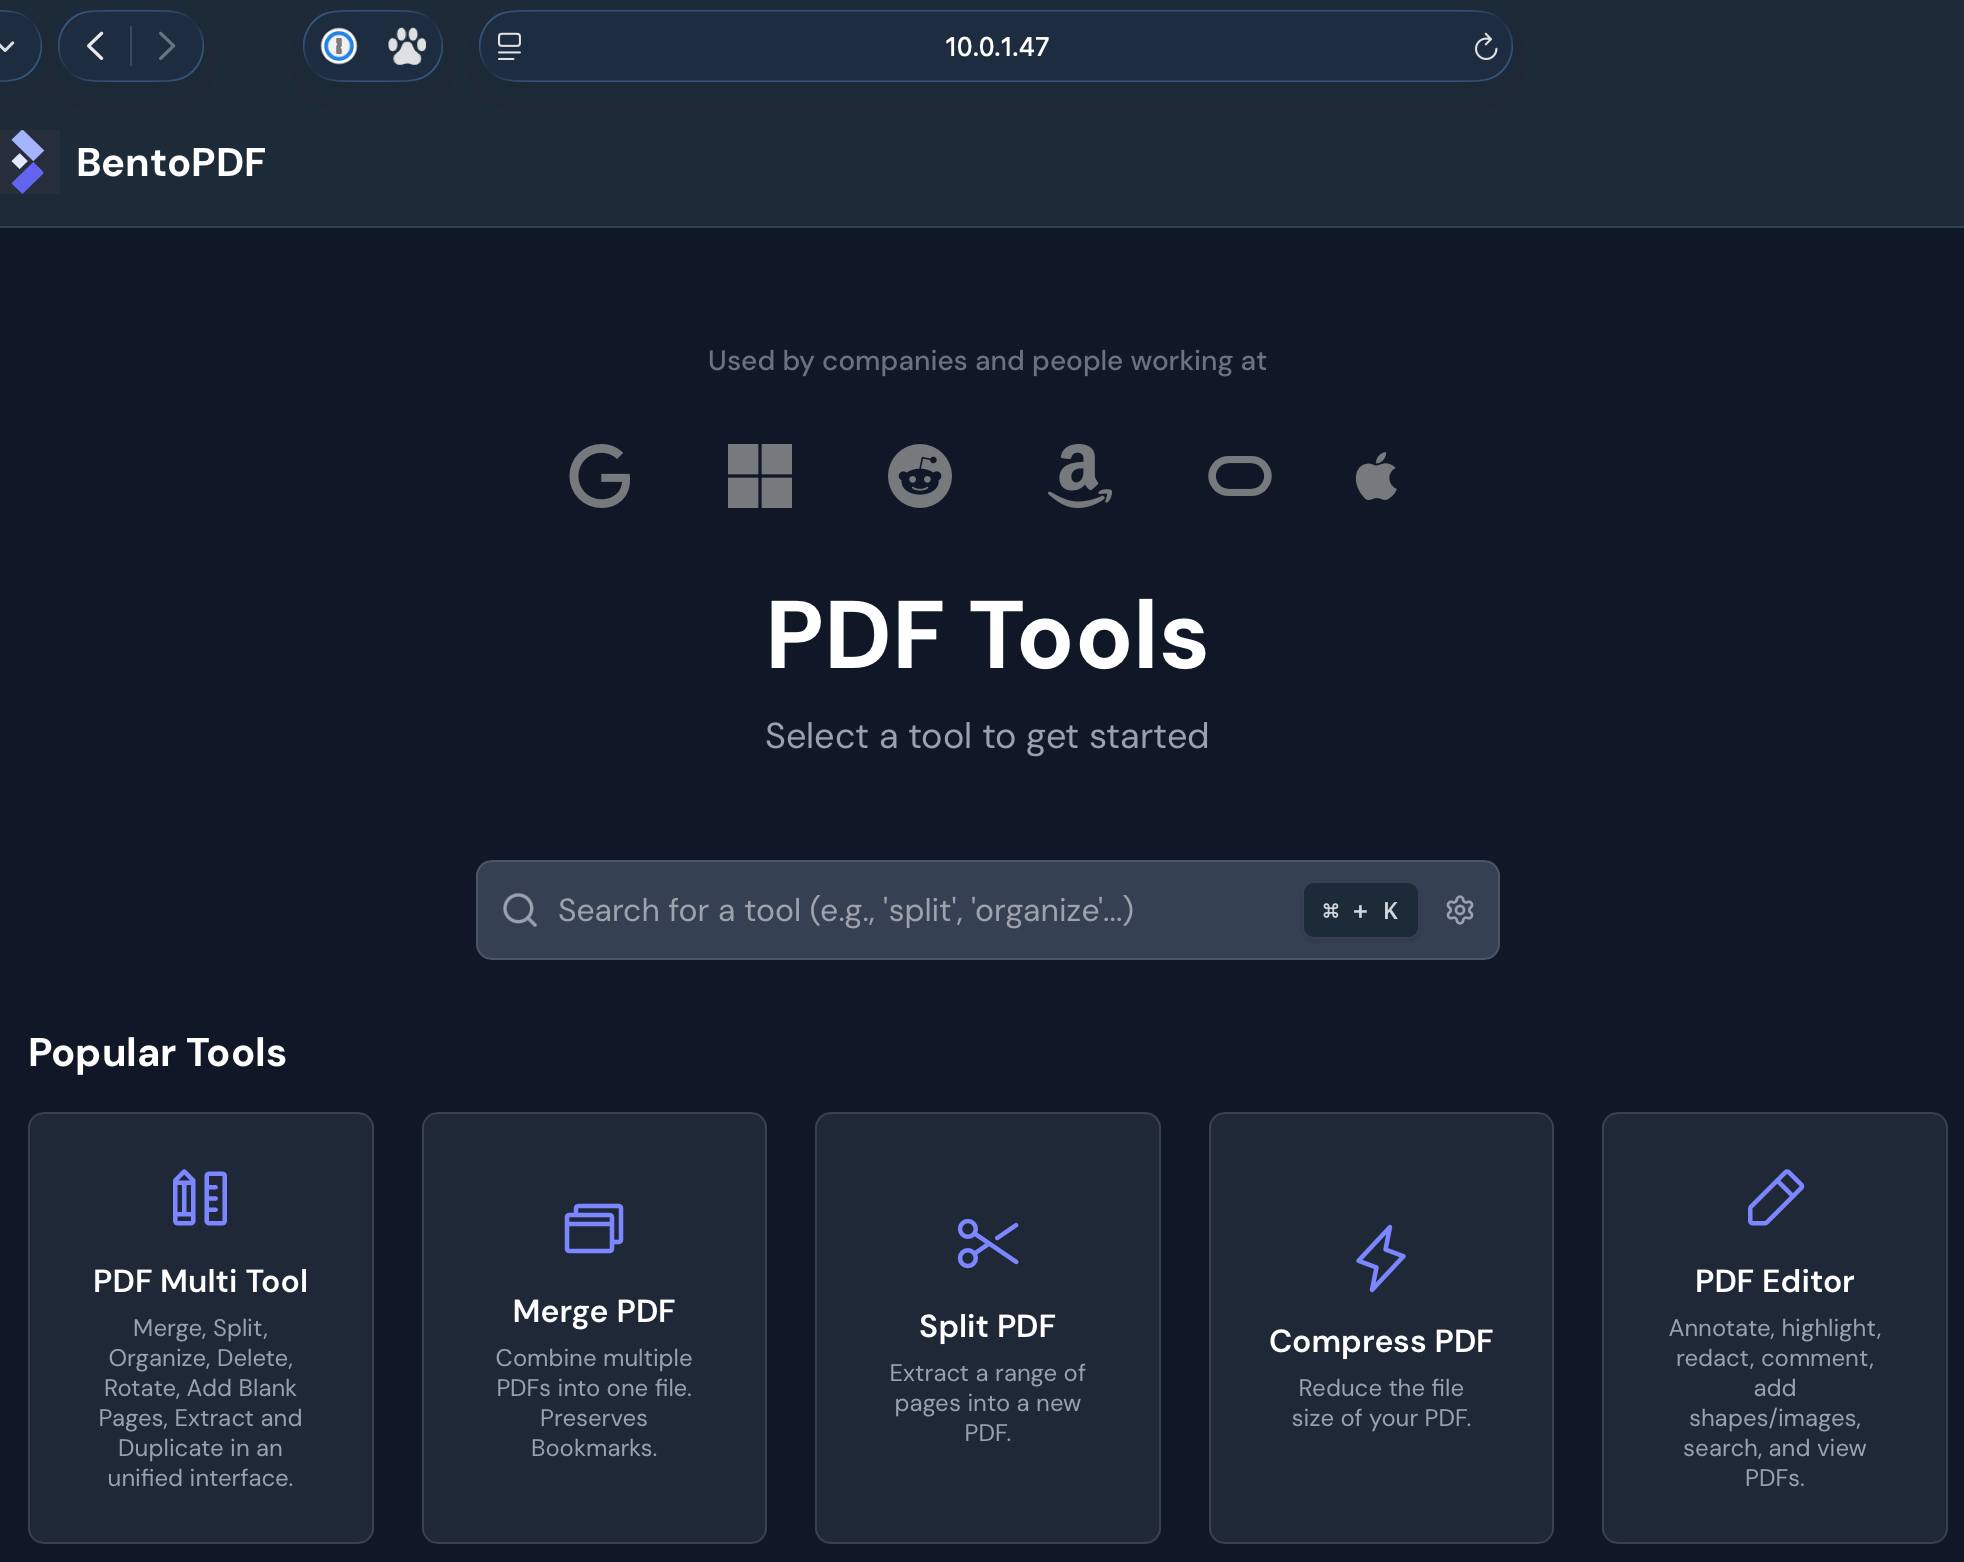
Awesome! It's working on your local network, lets publish it via CloudFlare Tunnels. 🎆
Part 3. Installing & Configuring Cloudflare Tunnels via Cloudflared
- Sign-up or sign into your CloudFlare Account via https://dash.cloudflare.com/login
I highly recommend creating a CloudFlare account and setting up External DNS domain with them. I previously used GoDaddy / SquareSpace and other dodgy DNS providers. CloudFlare can be as simple or as complex as you want to make it. CloudFlare Tunnel leverages their internal toolsets to automate so much configuration. You'll thank me later if you're migrating from another External DNS provider.
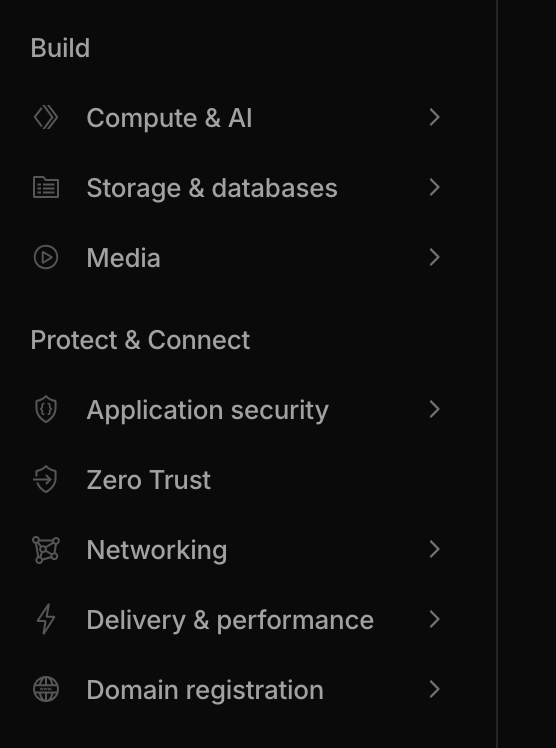
- Navigate to 'Zero Trust' under 'Protect & Connect'
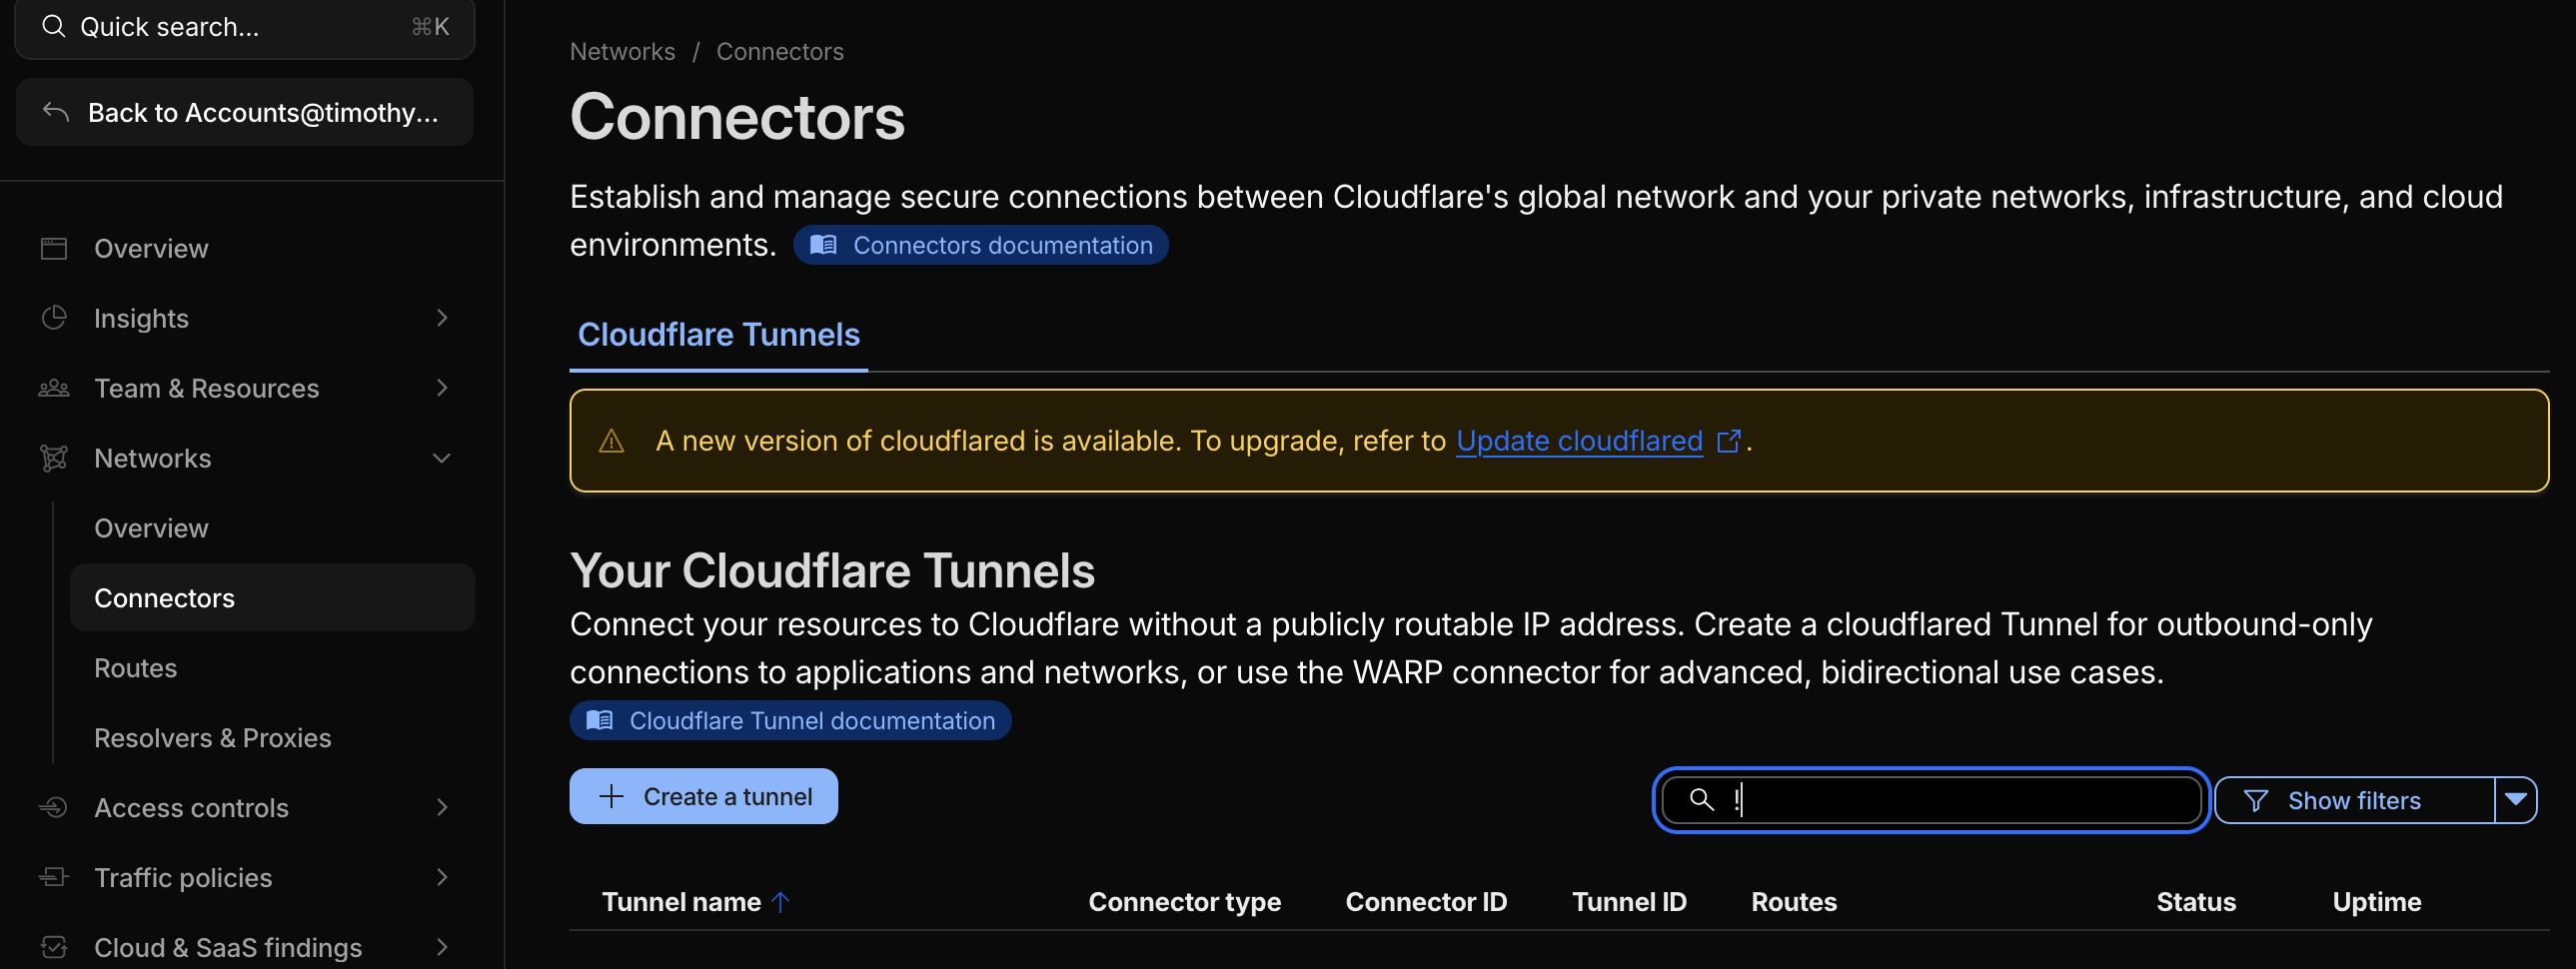
- Navigate to 'Networks > Connectors' and select 'Create a Tunnel'
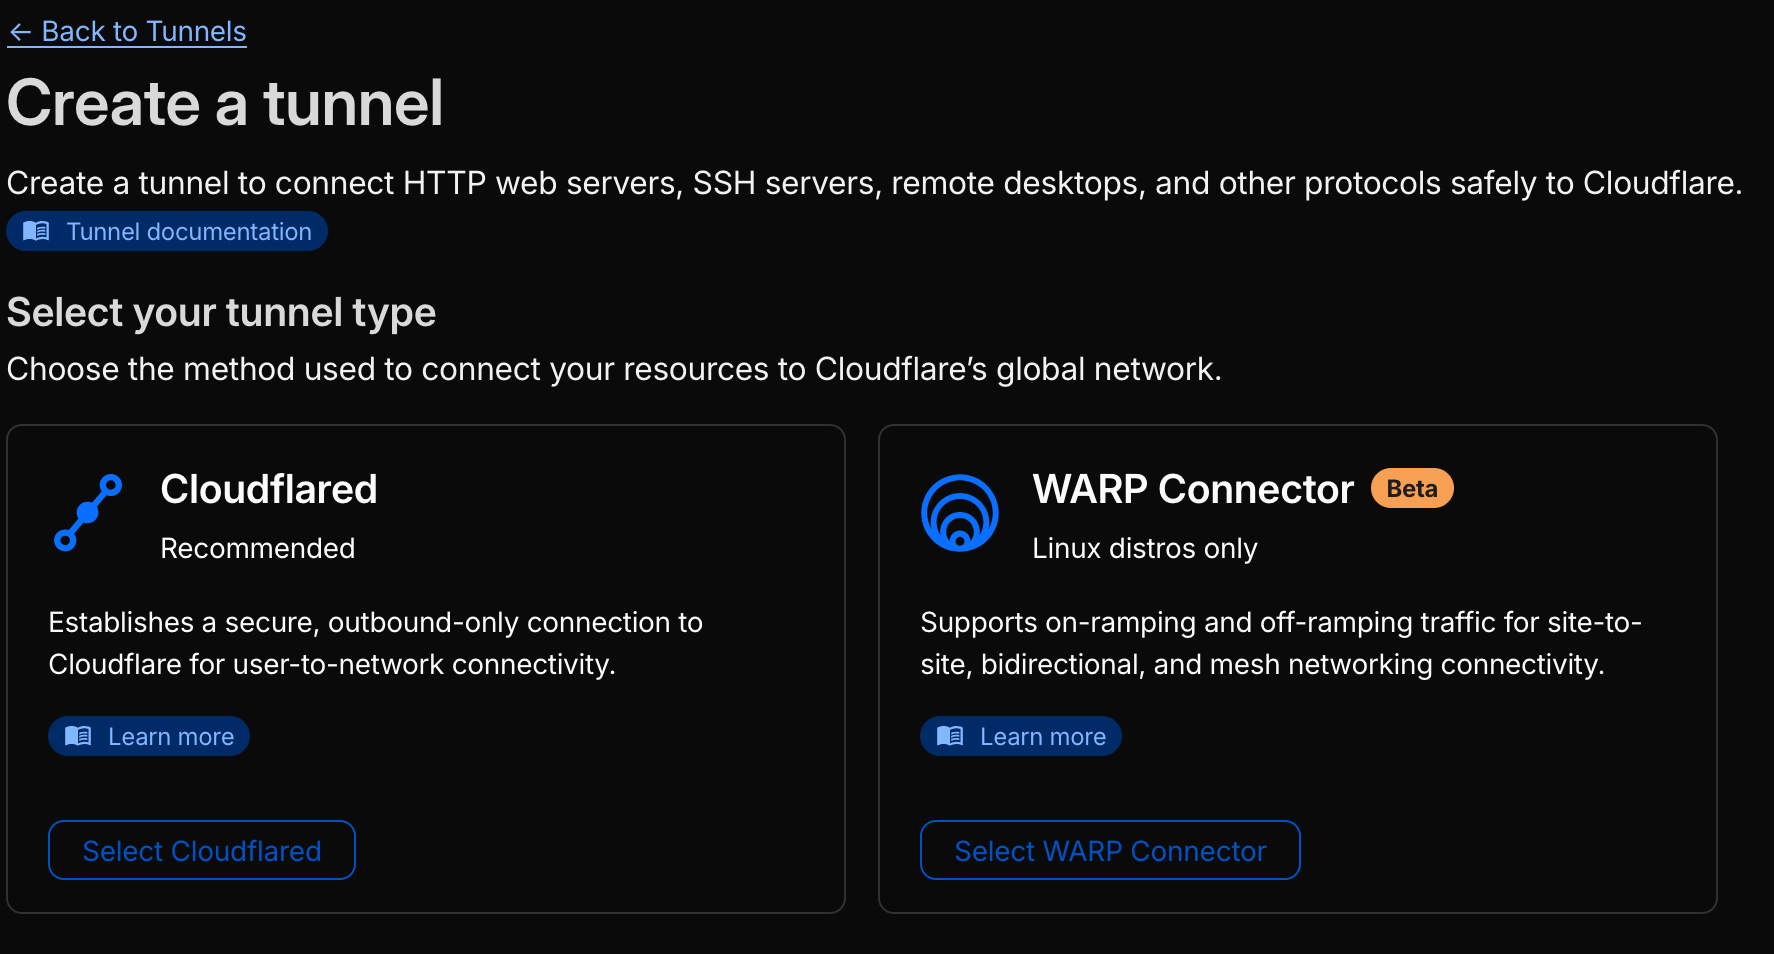
- Select 'CloudFlared'
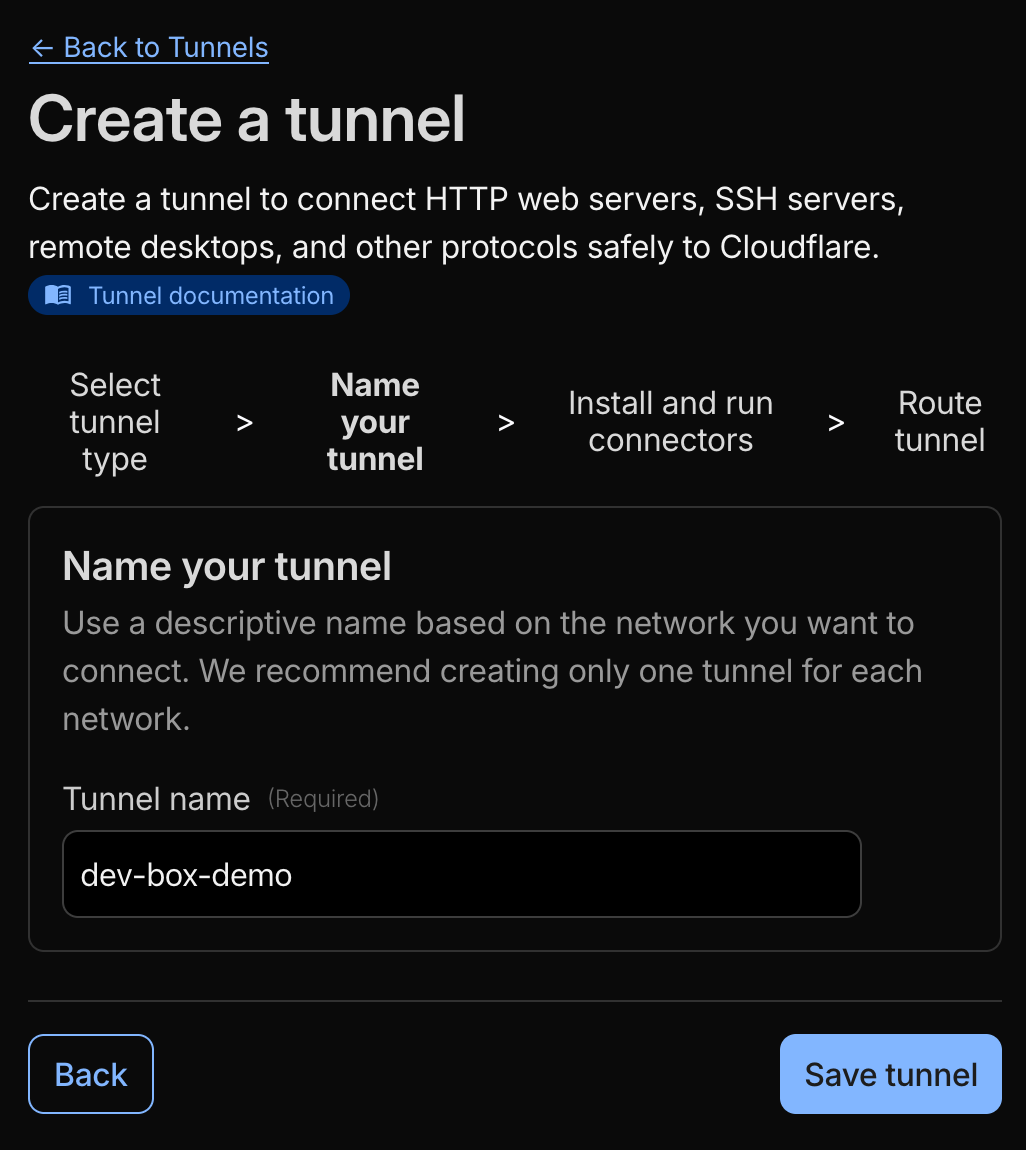
- Give your tunnel a Name.
I'd recommend naming it based on the host you're hosting it on. Since a Cloudflared tunnel can create multiple endpoints to different containers/services you're hosting on your docker host.
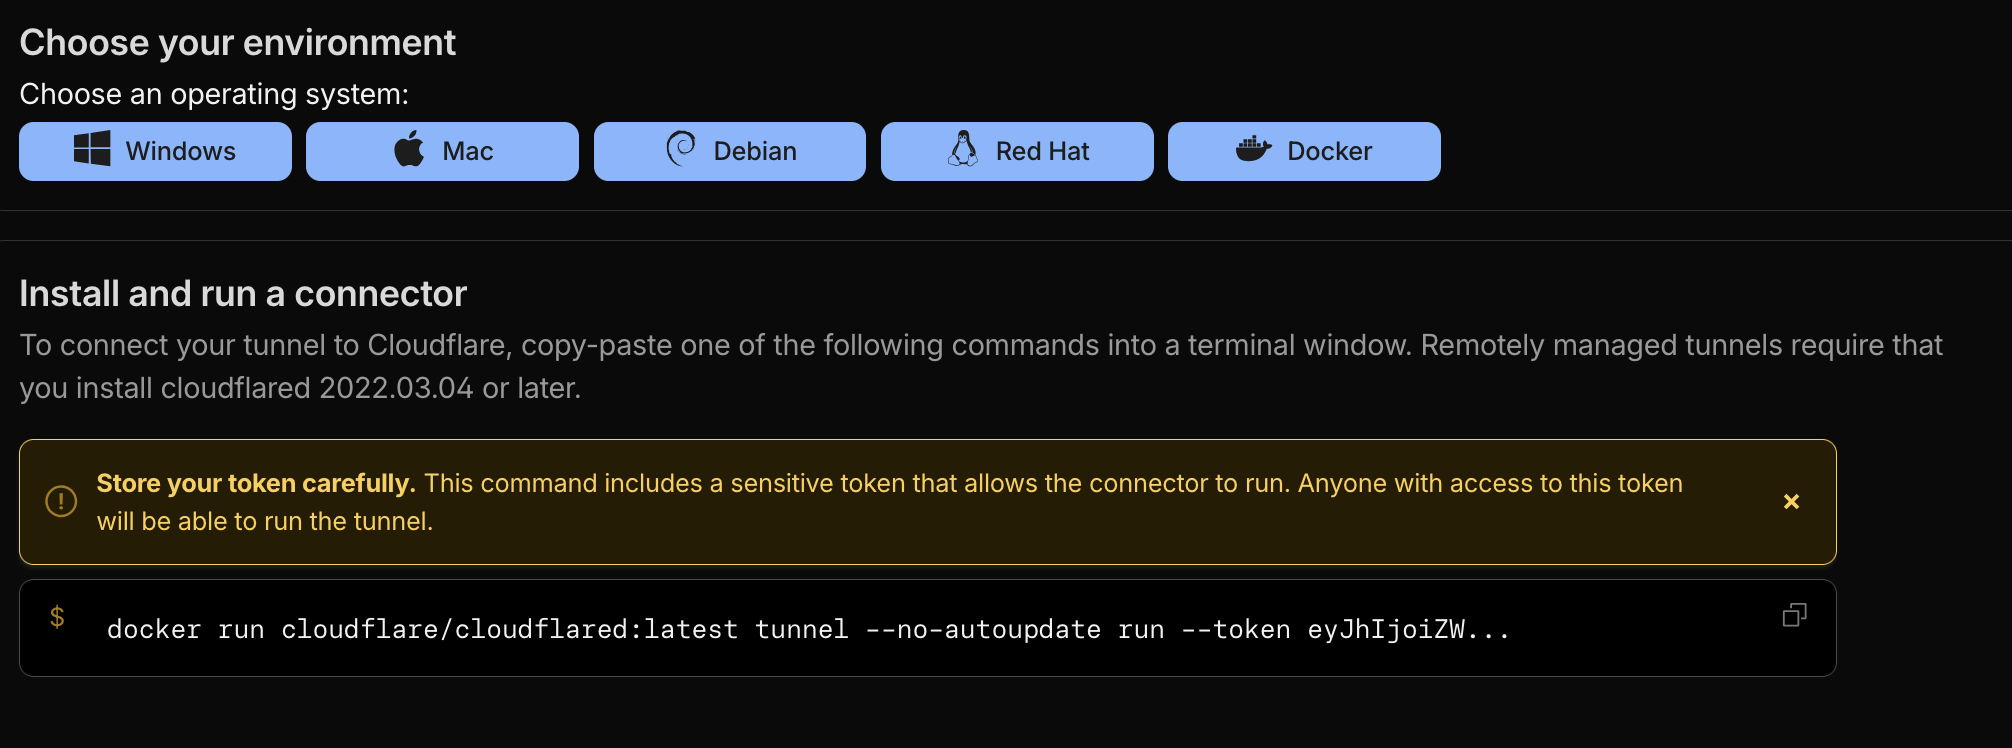
- Select 'Docker' under 'Choose your environment' then click the
copy⎘ symbol thedocker run...command and lets extract the string after--tokenthen save it somewhere securely for the next copy of steps
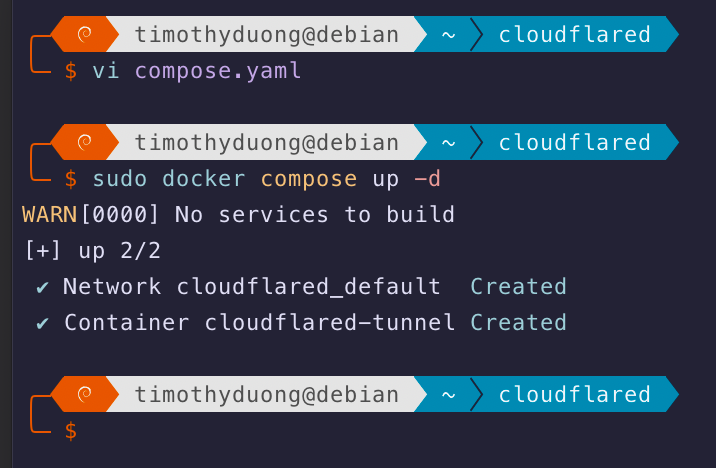
- Now, lets create a new folder to store and launch your Cloudflared configuration. Run
mkdir ~/cloudflared && cd ~/cloudflared - Then create a new
compose.yamlfile with the below in it, remember to replace {TUNNEL_TOKEN} with the Cloudflared token from a few steps earlier
services:
  tunnel:
    container_name: cloudflared-tunnel
    image: cloudflare/cloudflared
    restart: unless-stopped
    command: tunnel run
    environment:
      - TUNNEL_TOKEN={TUNNEL_TOKEN}
networks: {}
Example Compose.yaml file. Remember to update {TUNNEL_TOKEN} with the token from earlier
- Then run
sudo docker compose up -dto deploy the Cloudflared container
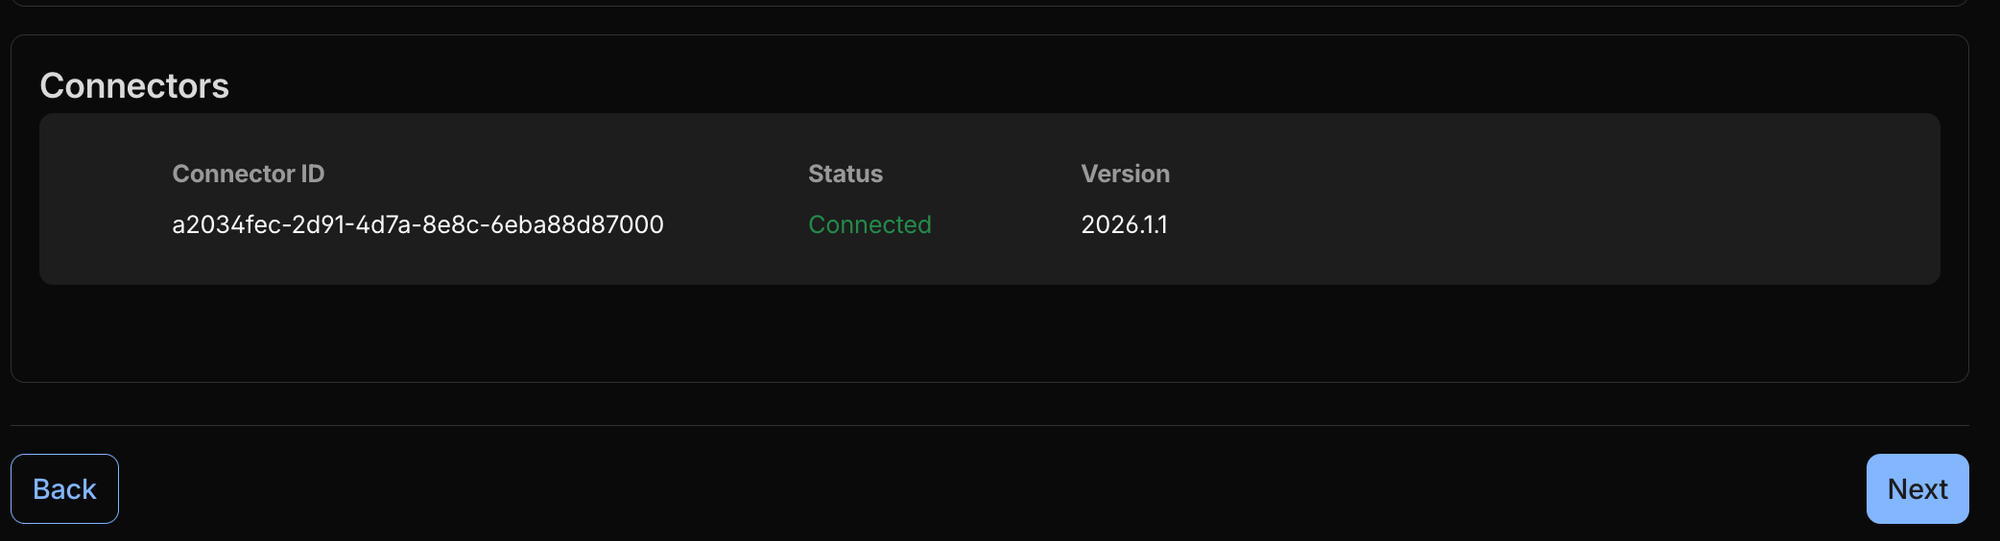
- Then check your CloudFlare page, if it was successful, at the bottom of the page there should be a 'Connected' status
- Select 'Next' to proceed and configure the tunnel. You will need an External domain in order to proceed.
Cloudflare DNS Registrar is highly recommended! https://www.cloudflare.com/en-au/products/registrar/
- Fill out the wizard: I've selected the following for demo purposes, fill it out to your needs.
- Subdomain: pdf
- Domain: timothyduong.me
- Path: <blank>
- Service: HTTP
- URL: 10.0.1.47:3000 (This is the local IP address of your Ubuntu Server/host and the 3000 Port is the default PORT for BentoPDF)
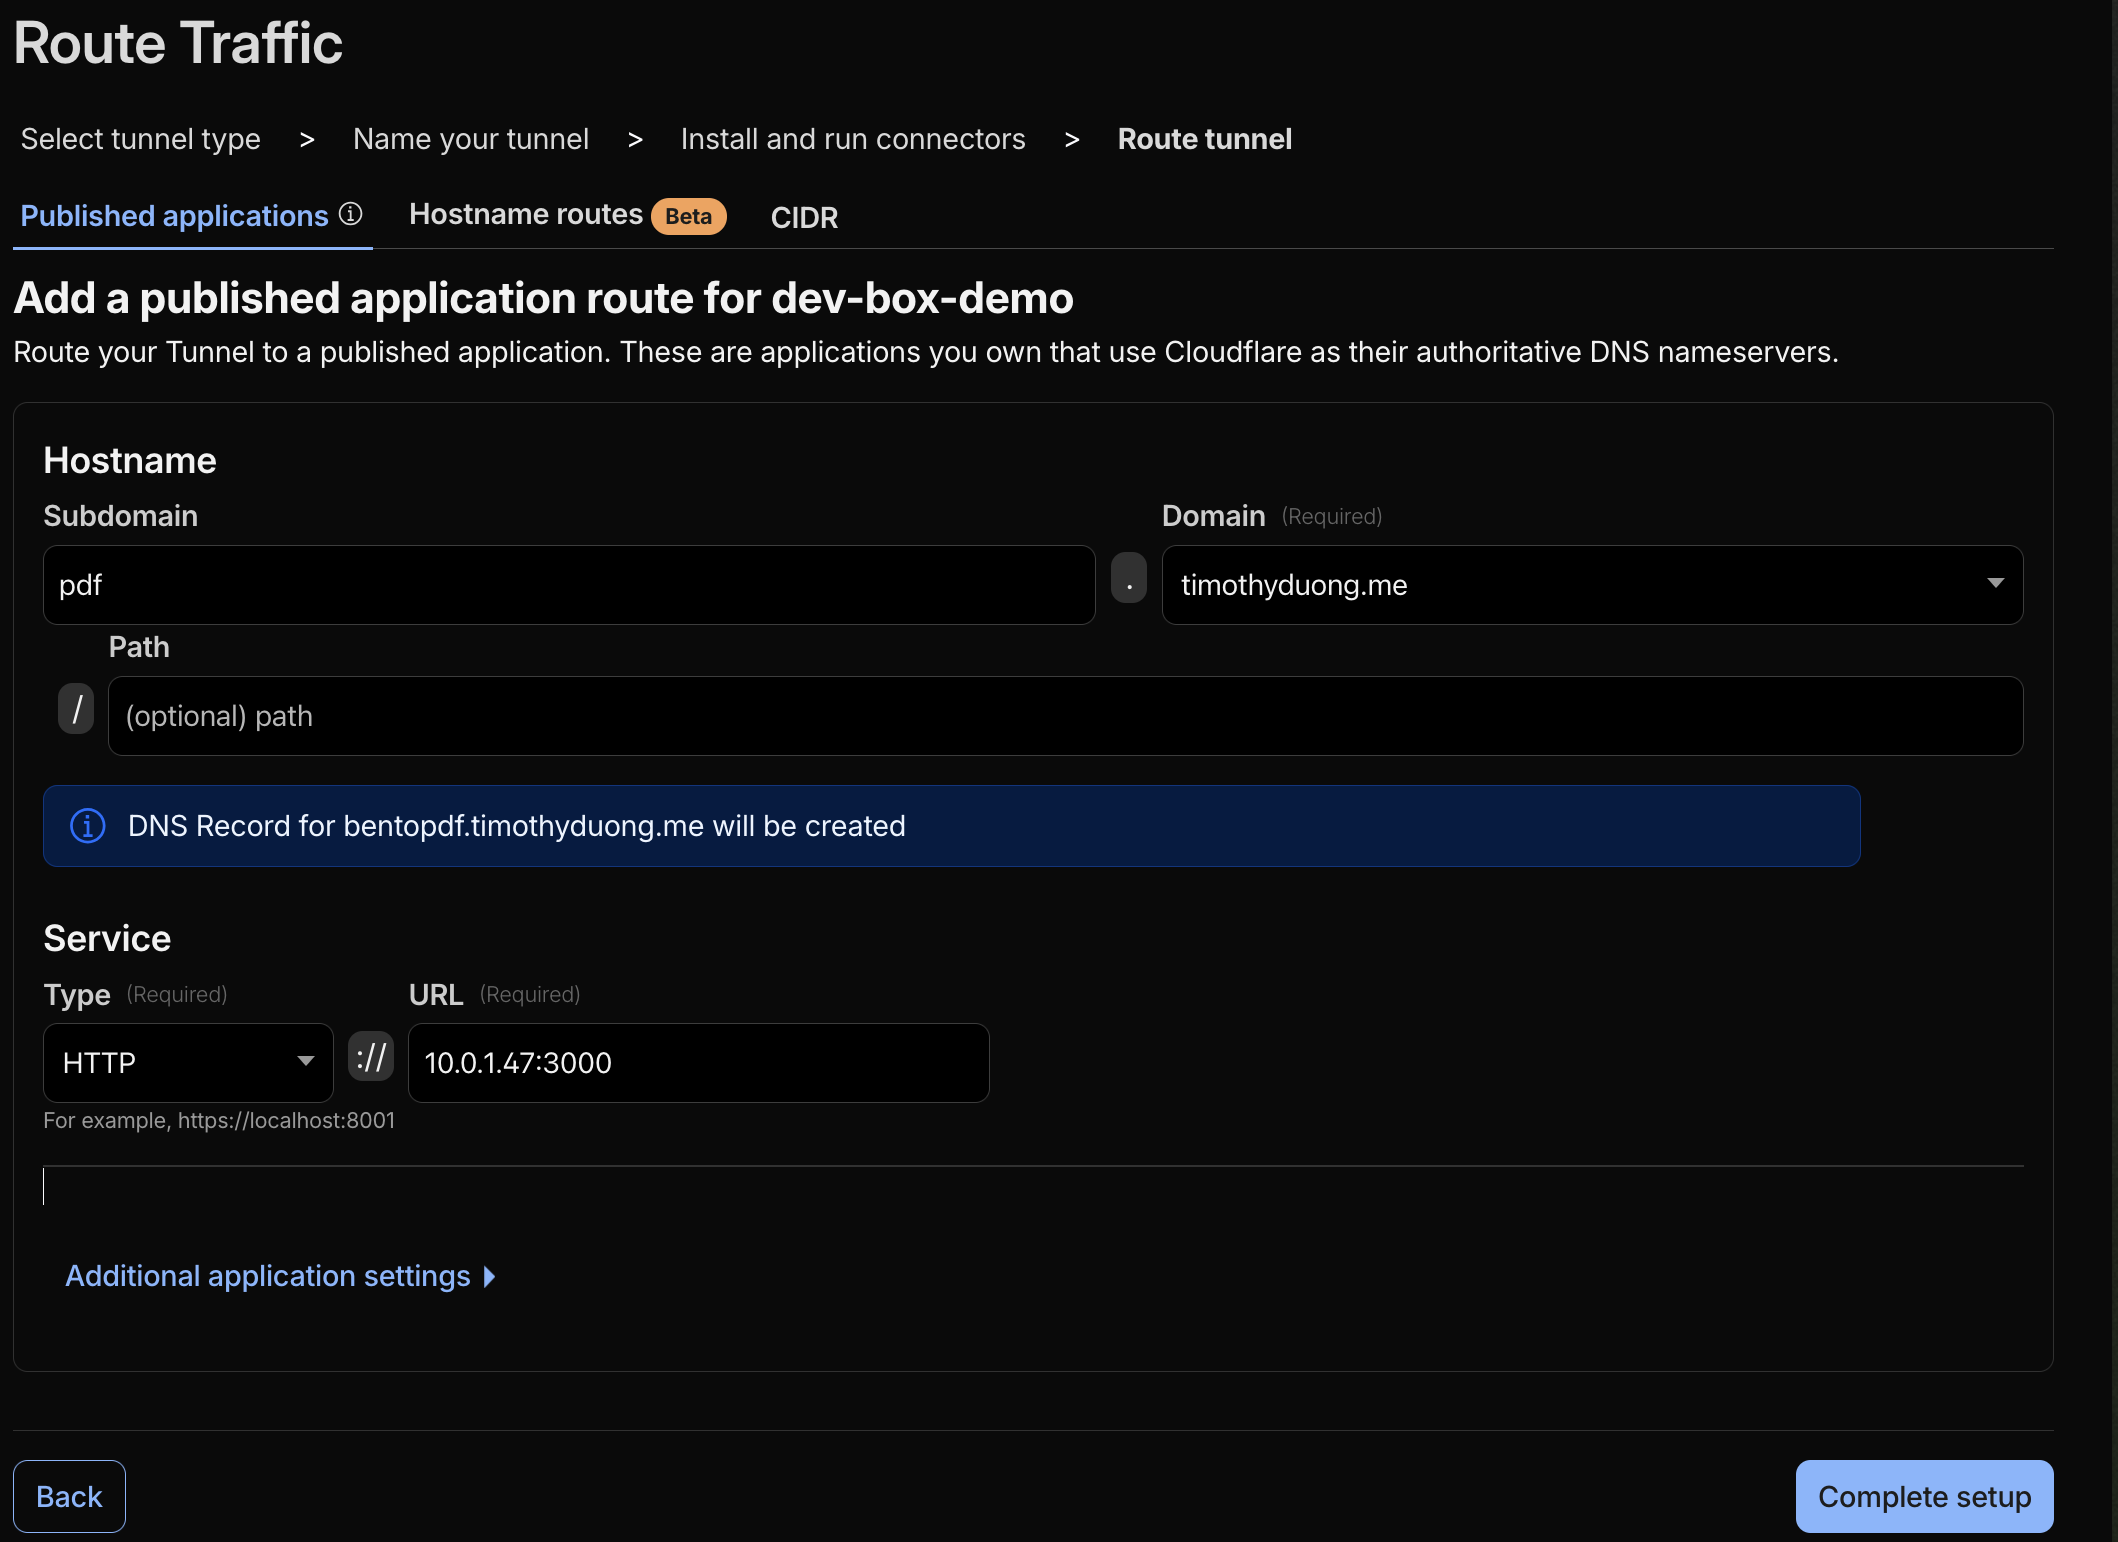
- Select 'Complete Setup' and it should take you back to the Cloudflare Tunnels dashboard
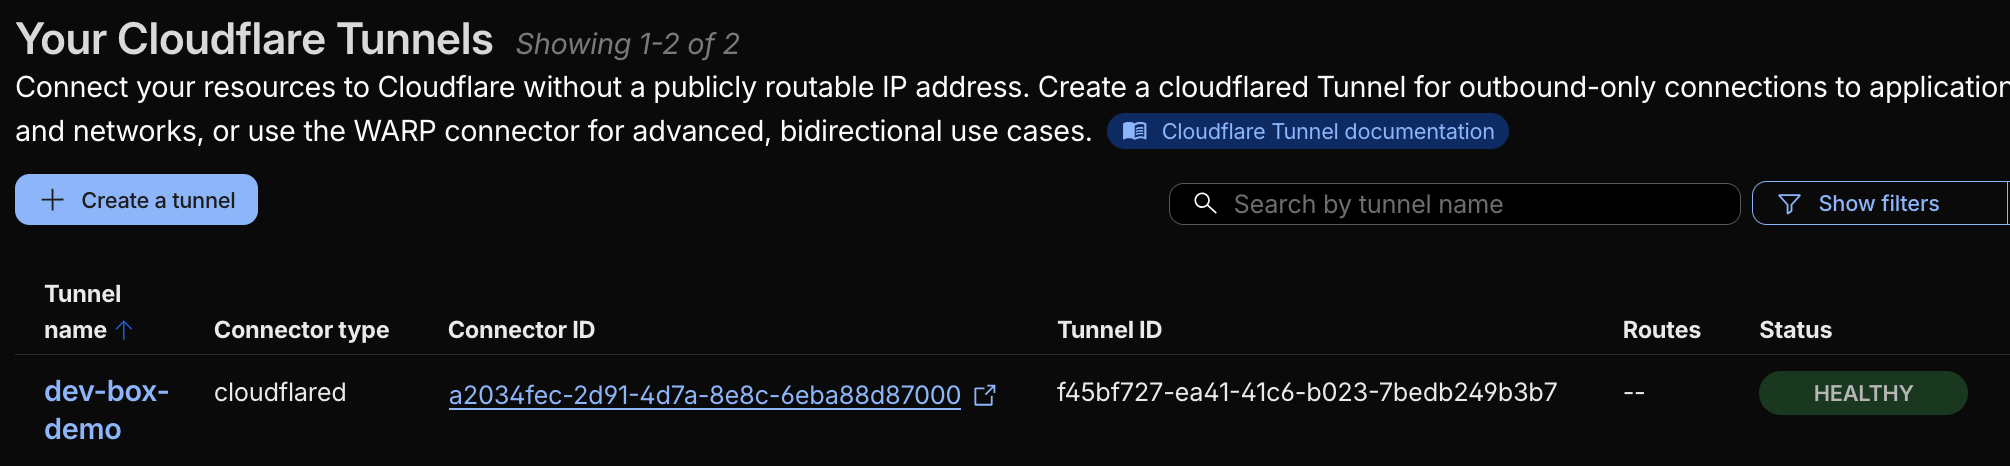
- You should now be able to go to your newly created URL and it should be serving the application at your Public DNS Subdomain with HTTPS!
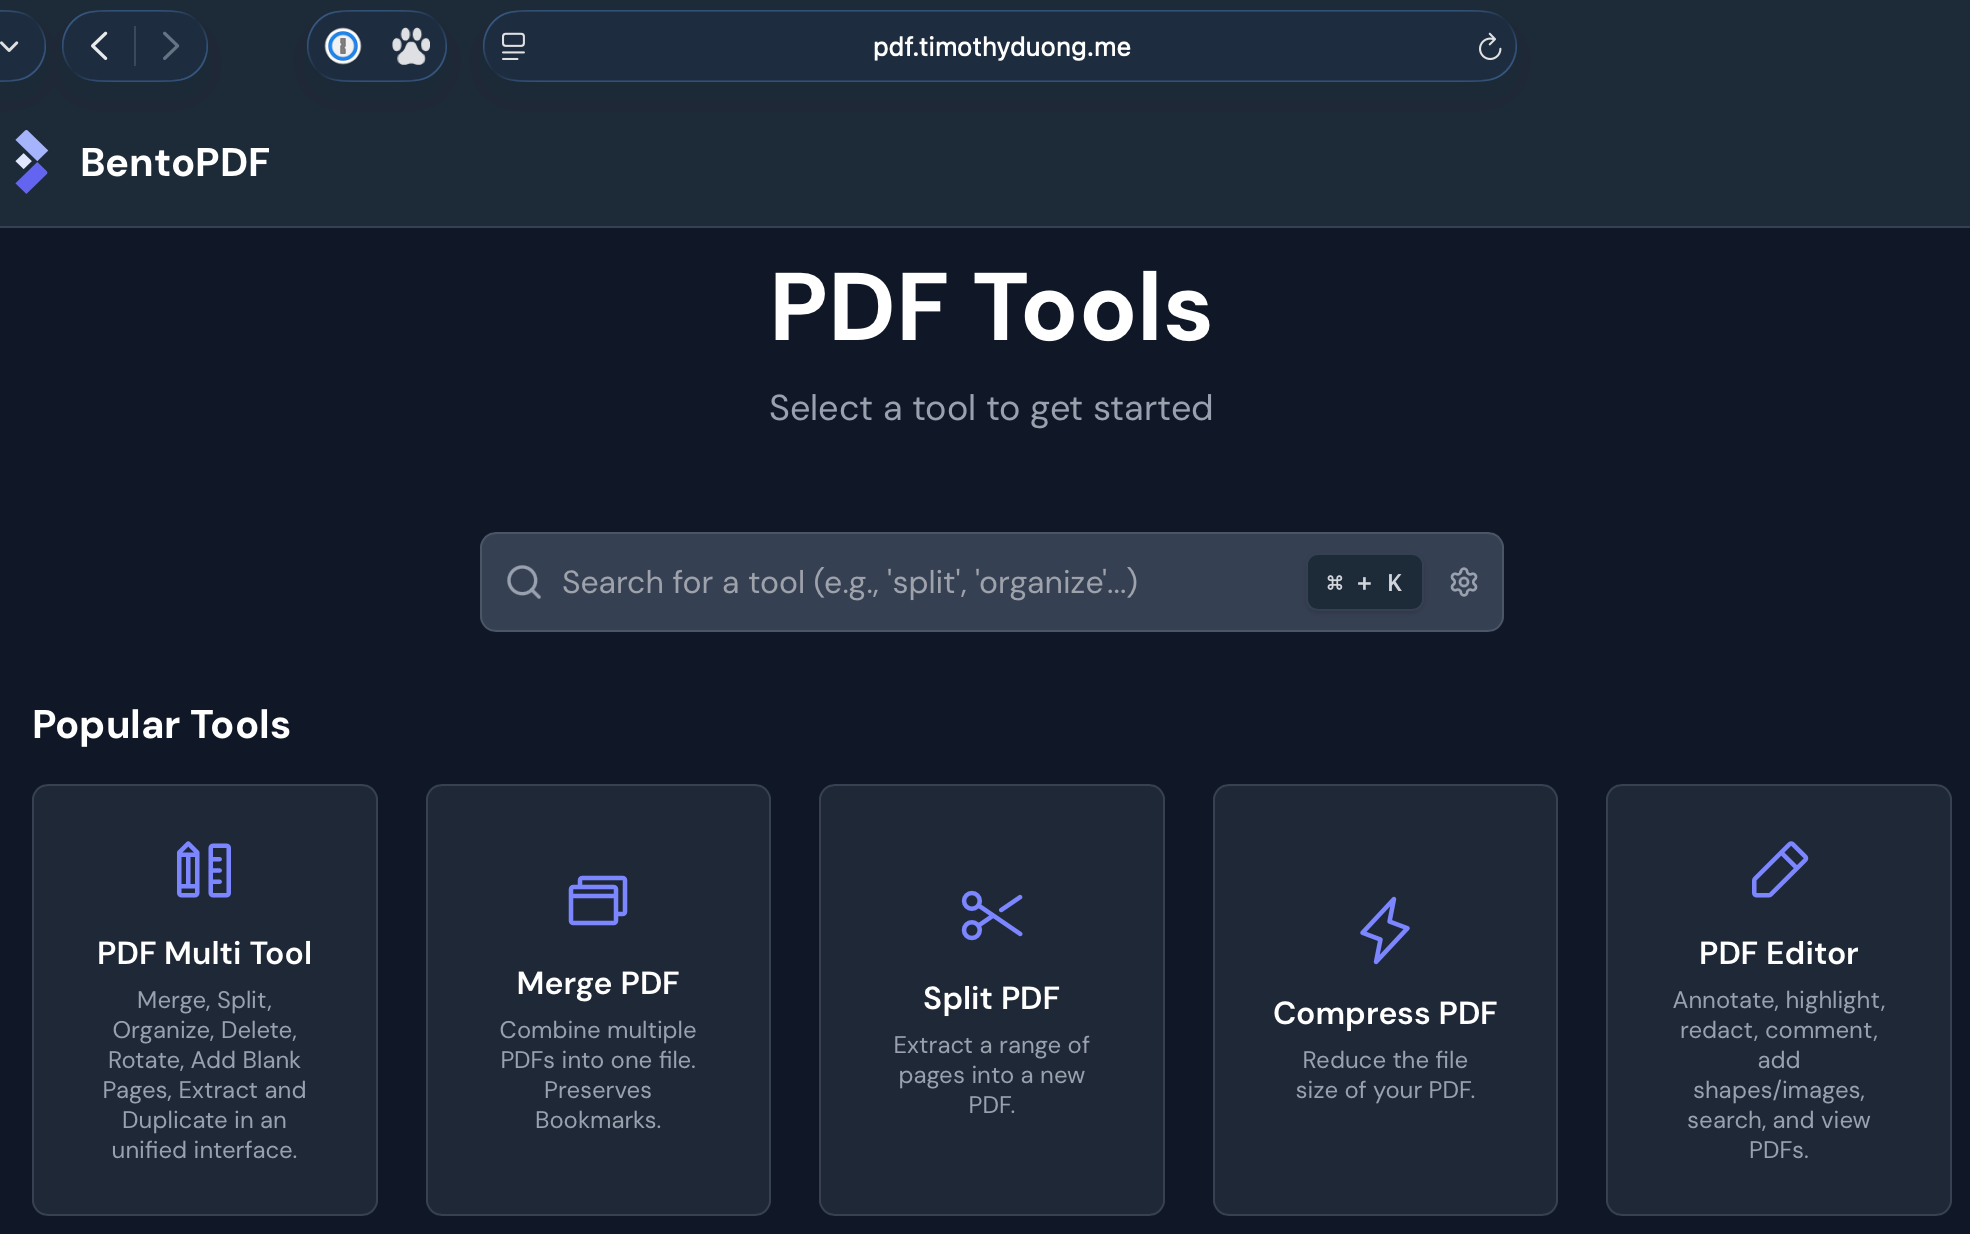
There you go! You're now hosting your own PDF application that is accessible by anyone. You, your mum, your friends. Take that Adobe Acrobat!
Mine is here: https://pdf.timothyduong.me/
FAQ
- External Domains? What about SSL Certificates? Cloudflare Tunnels sorts it all out, cause it is all inhouse, it runs back-end APIs between its DNS registrar and its network routes / Zero Trust Cloudflare Tunnels!
- How can Cloudflare Tunnels be free? Good question, there are limits to Cloudflare Tunnels and their other products. This could change any moment but its the simplest solution out there in my mind. The compute required to provide for free-services must be a drop in the ocean from the revenue from their paid CDN customers.
- Is Cloudflared / BentoPDF secure? It depends. CloudFlare Tunnels/Cloudflared is only as secure as the app you're pointing it at is. If your app is secure, then Yes. If you're sharing a webpage with direct access to a database or a login-page, then someone can just upload malicious data there or brute-force it. That is why I chose BentoPDF to deploy, cause it runs browser side (no pdf injection) and has no login capabilities (no brute-force).
- How do I update the containers / apps?
- Run the following commands from your Docker Host
- BentoPDF:
cd ~/bentopdf && sudo docker compose pull && sudo docker compose up -d - Cloudflared:
cd ~/cloudflared && sudo docker compose pull && sudo docker compose up -d
- BentoPDF:
- Run the following commands from your Docker Host
- How do I stop BentoPDF or Cloudflared?
- For BentoPDF:
cd ~/bentopdf && sudo docker compose down
- For BentoPDF:
- For Cloudflared:
cd ~/cloudflared && sudo docker compose down - Where can I learn more about Docker CLI commands? https://docs.docker.com/get-started/docker_cheatsheet.pdf


Member discussion